Using Fences and Page Manager to optimize HTML markup in Drupal 7
I have been searching for a way to make Drupal output cleaner, lighter, more semantic HTML since I started theming. We all know Drupal core, and it's many contrib modules have a tendency to inject a couple-two-tree divs in 'dere. I have tried many different ways, much to the chagrin of the developers I have worked with, most of them probably not worth the effort I put in. That is until now!
The goal of my approach here is to minimize the markup that Drupal puts out, and gain complete control over the what and the where of the markup. I can gain control of the fields using the Fences module; control over the templates in my theme; and gain even more control over the placement and what gets loaded using ctools Page Manager and Panels. I will step through each of this in detail below.
I started down this particularly awesome road after seeing Steve Perch's Rendering HTML with Drupal: Past, Present and Future presentation at MidCamp 2015, and continuing the discussion with Jason Bell. Check out Jason's equally great presentation called Exploring Panels. The idea presented in Steve's presentation was that instead of making the output of Drupal look like what a designer had designed for us, let us set the goal of making the output of Drupal be the code that the design is. This idea really resonated with me. Jason's presentation is a great foundation of what Panels is, and what it can do.
Normalizing the markup
Resetting Fields with the Fences Module
The Drupal Fences module is a wonderful tool to override the default field templates, on a field by field basis. Once installed, the module gives you an additional setting on the field edit screen to choose from a large list of semantically marked up HTML templates, or one you can create.

If you can define the HTML you want for the field, great. I use this setting to select the "no markup - No wrapping HTML" field wrapper, which removes all HTML from the field, leaving just the content.
Resetting Templates
With the HTML set on the fields, my next task is to remove the HTML from the templates in the theme. From Fields upwards, we need to address the Node, Region, and Page templates in our theme, and should address the Block, Panel Pane, and Views templates while we are on task.
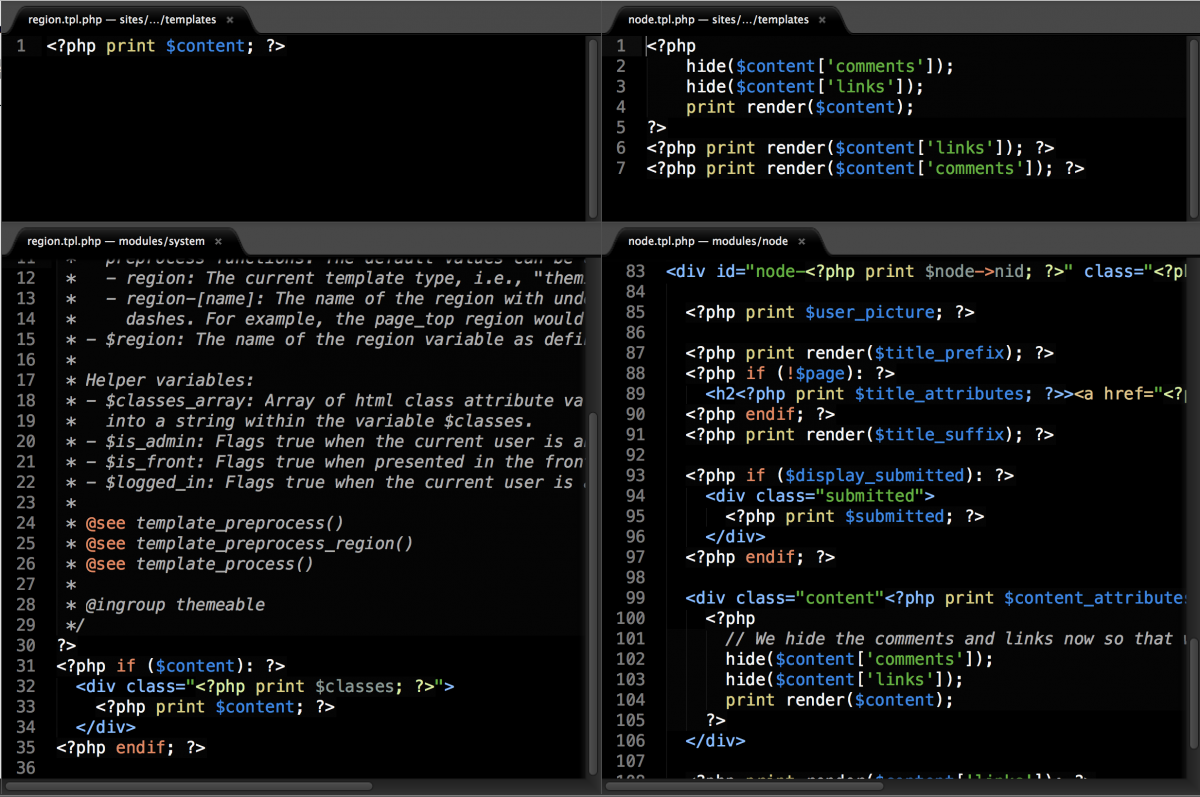
Copy the needed templates from core and contrib modules into your theme. From there, remove, edit or add HTML to your liking. In the screenshot below, I have the Region and Node templates. On top you can see my edited code, on the bottom, the original. I have removed a lot of HTML and PHP. For instance, on the Node template, I have removed the user_picture, and submitted functionality because I know I am not using it on this site. I have also removed all the Title functionality, since I use the Title module, which turns my node titles into fields.
Building the layout with Panels
Panels Layout Plugins
The Chaos tool suite (ctools) module contains all the behind the scenes tools, including the Page Manager module, Chances are you have this module already installed and enabled. Verify you have ctools, Page manager (page_manager), and Panels installed and enabled.
In your theme, create a folder called layouts. In your theme's .info file, add the following line, which tells the theme where you are going to keep your layout plugins.
; Panels layouts. You can place multiple layouts under the "layouts" folder.
plugins[panels][layouts] = layouts
Copy a layout plugin, the whole folder from:
/sites/all/modules/contrib/panels/plugins/layouts/
The plugin contains 4 files:
- .css - The CSS file used to layout the admin.
- .inc - This is the plugin, defining the attributes of the layout.
- .png - The icon for the layout, used in the admin.
- .tpl - The template for layout.
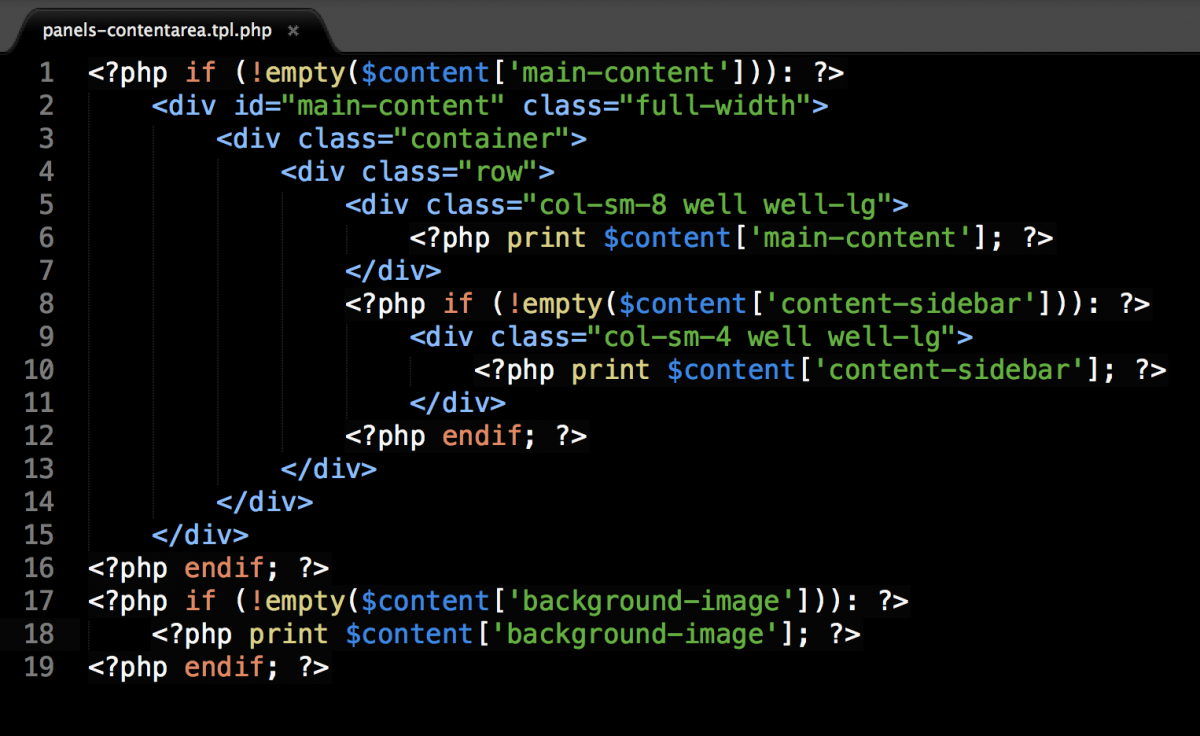
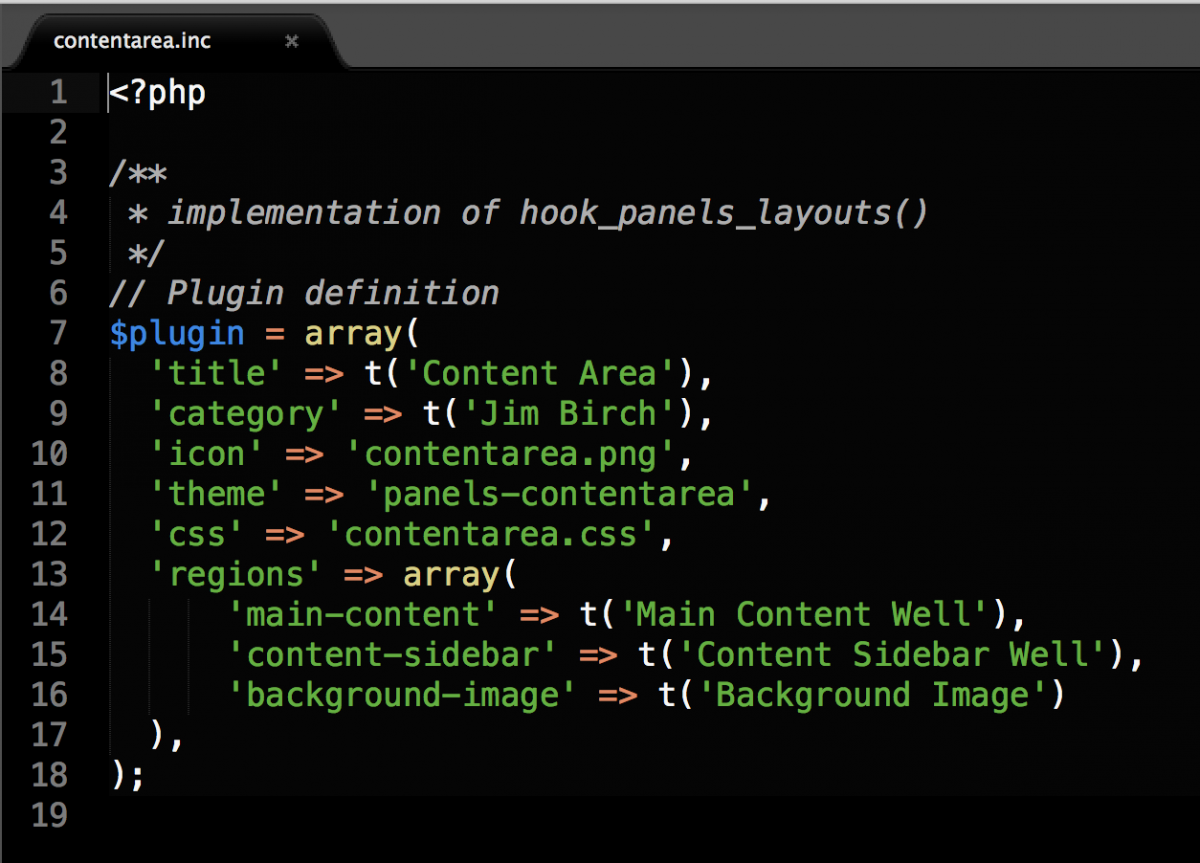
Here is the markup for the "Content Area" layout that this site uses. It has a region for main-content, content-sidebar, and background-image. This code is very similar to the Template system. Using PHP, you can define the regions and HTML for those regions.
In the .inc file, you define what the attributes are. If you want to add or remove more regions, add them here, before you add them to your template file. Also, be sure to make a category that will group your new layouts together, for your administrators to choose.
Panels Everywhere
Traditionally, Panels replaces the "content" area of a Drupal layout. With the Panels Everywhere module, you can replace the Region system of Drupal. It provides a Site Template (site_template) page, that will be used on all pages of the site. You also can set variants based on different contexts like path, node type, taxonomy term, user role, etc...
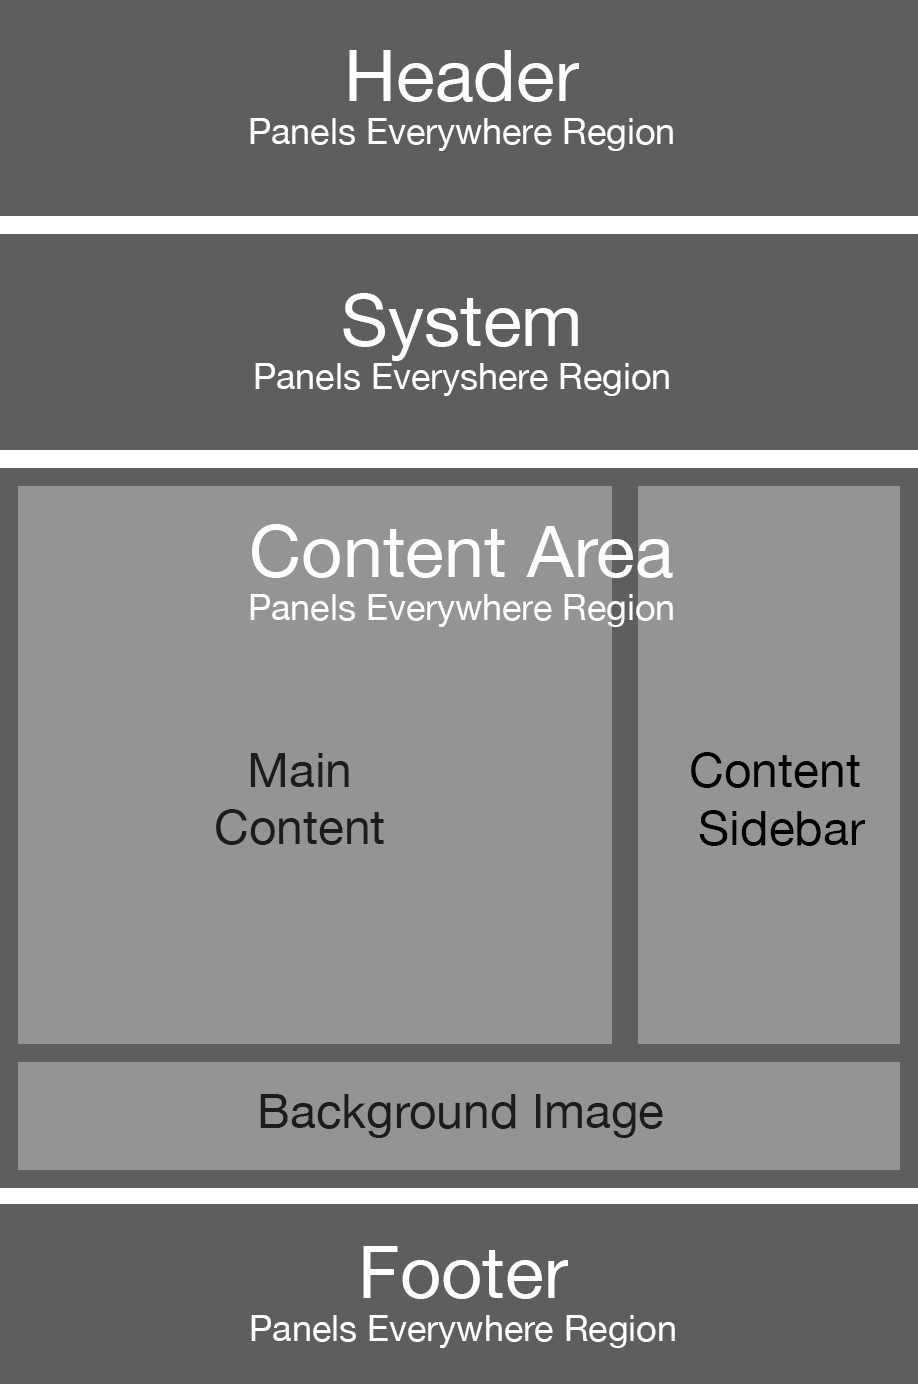
In this diagram, the Panels Everywhere template would contain the darker regions. The main content panel would be nested in the "Content Area" region of the Panels Everywhere layout. Those 3 regions are the lighter color.
Putting it all together with Page Manager
Site Template
In Page Manager, click EDIT on the Default site template. Build a default variant, this is one that gets used all the time. On the General tab, you can remove excess CSS. Here are some classes that can be removed to lighten the load:
no-sidebars page-node- node-type-page not-logged-in html logged-in one-sidebar sidebar-first not-front
You can also add classes, and ID, or additional CSS to be loaded inline.
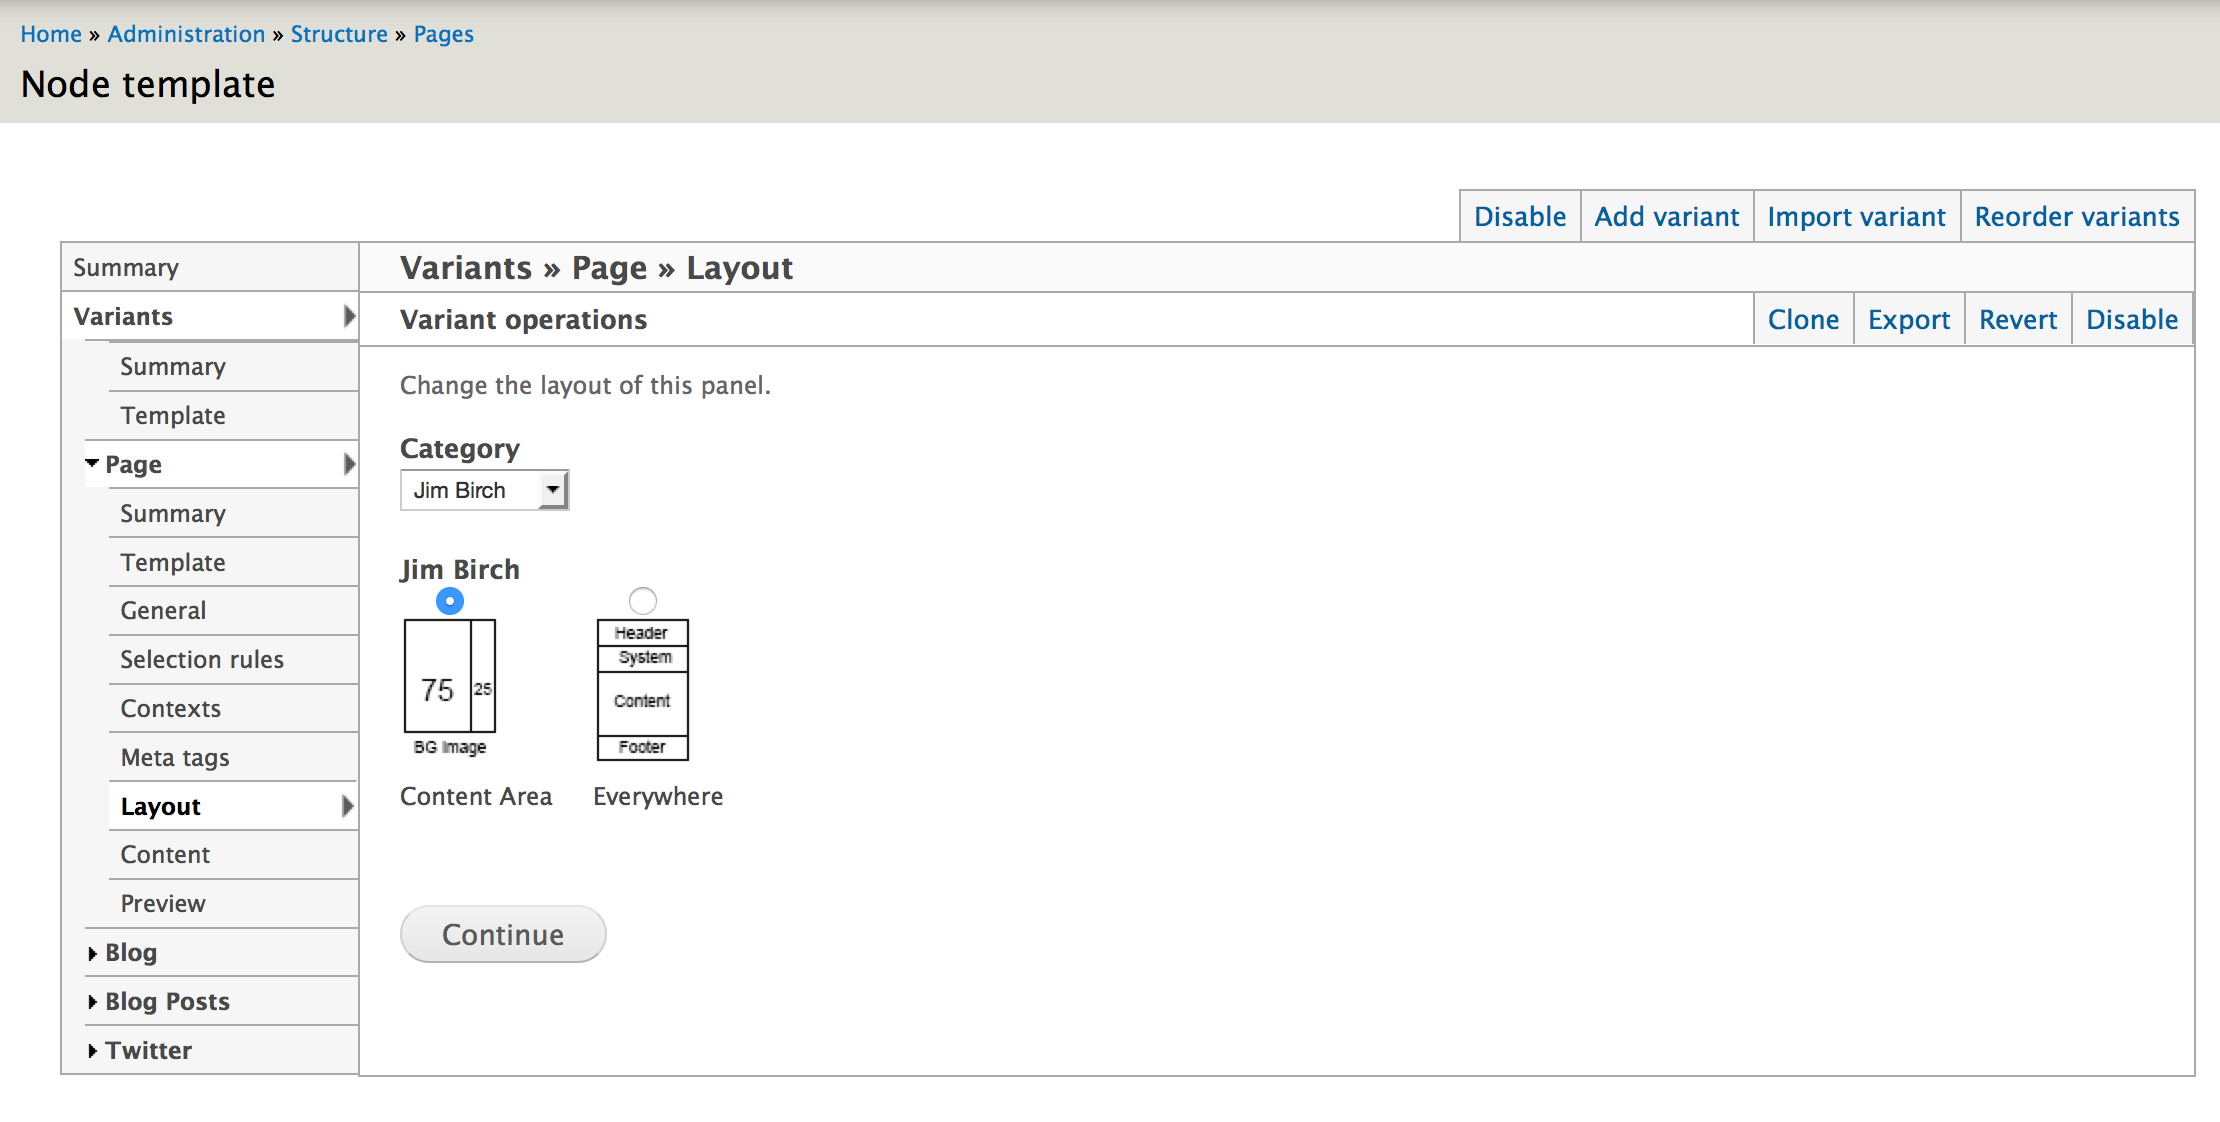
On the Layout screen, you can see your layout plugin brought to life in the UI. Choose the Category, then the appropriate layout:

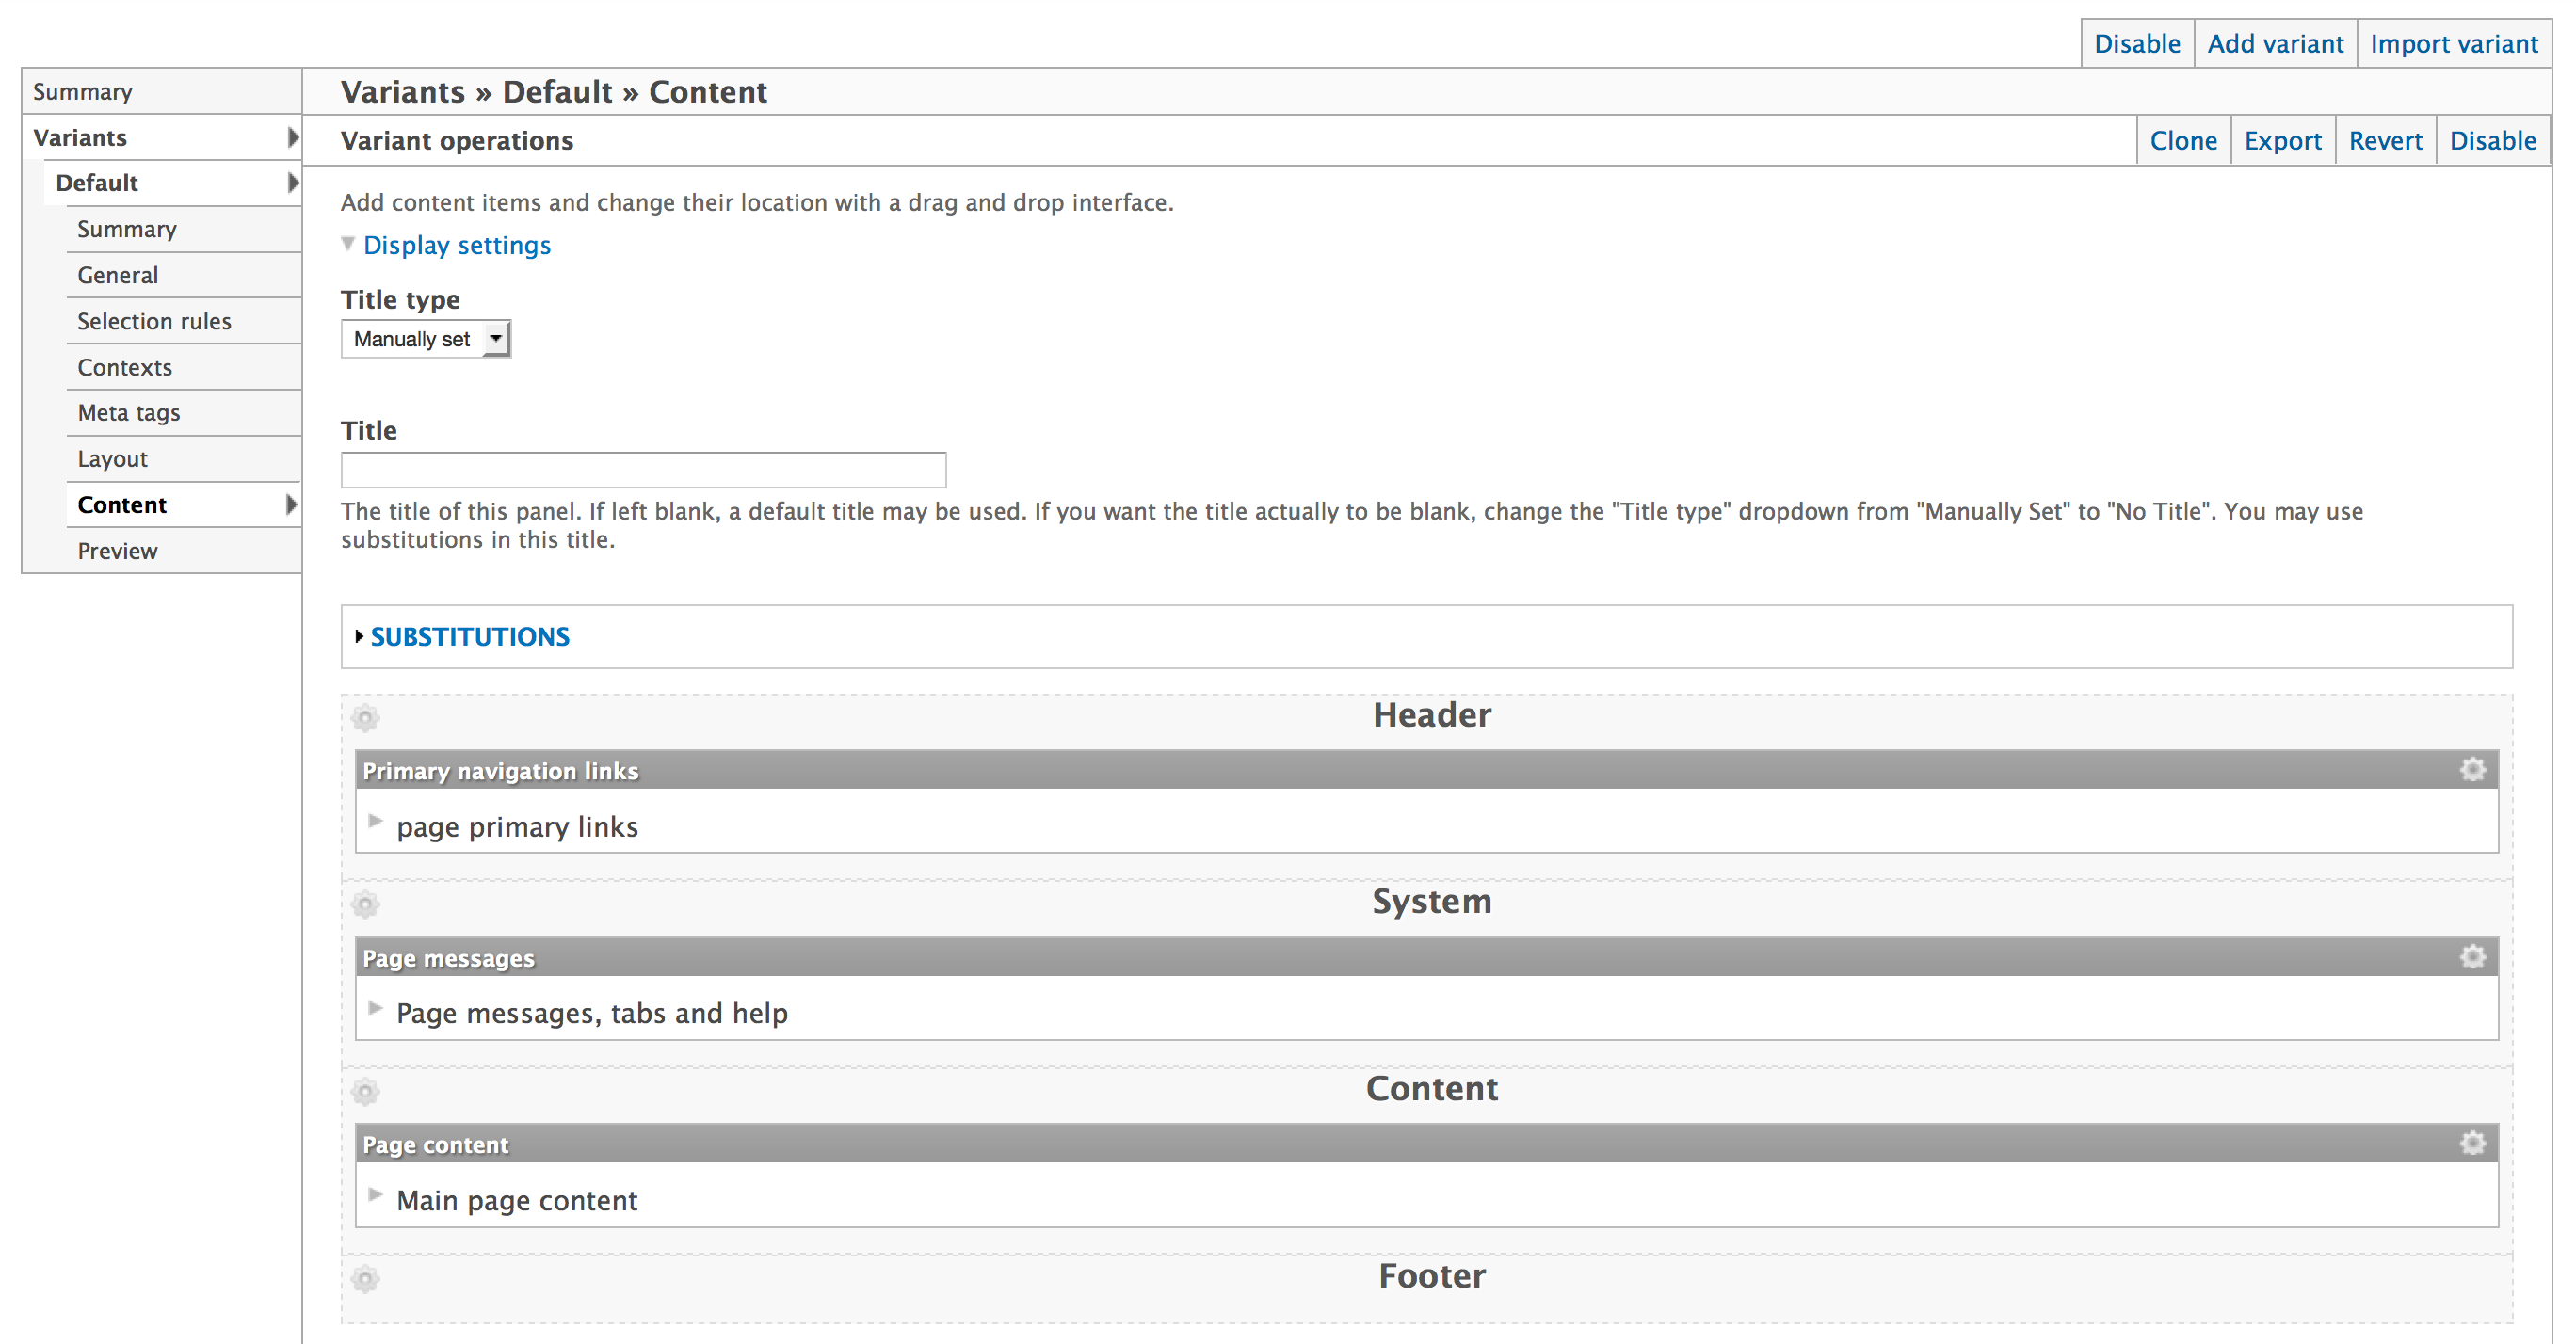
On the content screen, you can choose the items that go in this template. You can choose page elements, block, content panes, tokens, and much more. For the sitewide template, be sure to include Page Messages, Tabs, and Help, becuase we have removed them from the theme templates. You also need to include the "Page content" element. That is what makes the next level of layouts work.
Node Page
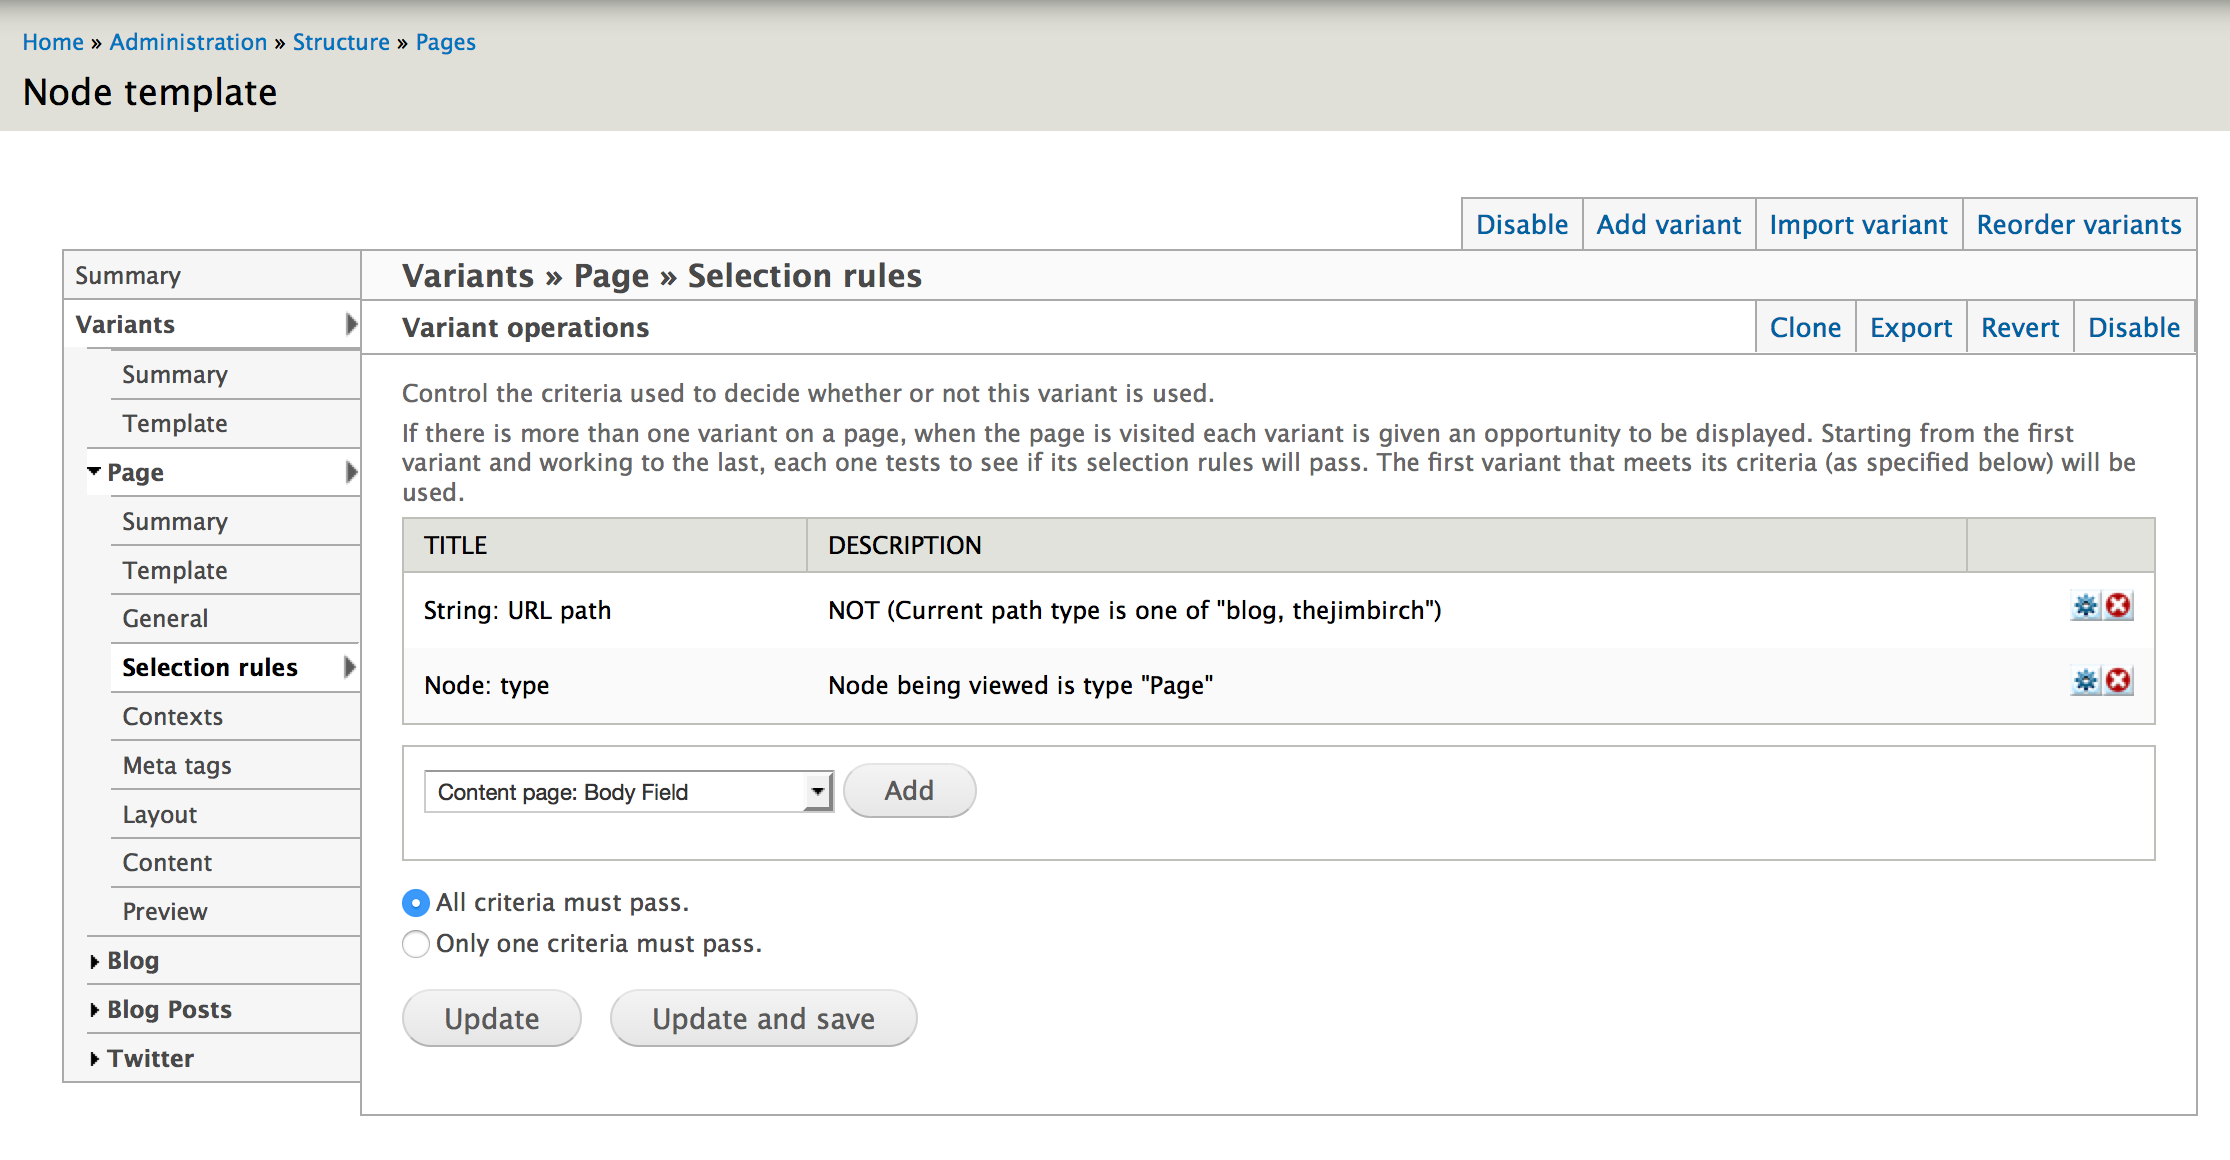
Now the fun begins. Back in the Page Manager, click EDIT on the Node template page. Add your first variant, that will be for your first content type, let's say Page. The screens are the same as the previous step, but this time, we will want to set some rules up in the Selection Rules. The important one being Node Type = Page. I also have set up an exclusion to NOT use this variant if the page has a path of /blog or /thejimbirch. I have other variants for that.
Next, I choose the appropriate Layout for this variant:
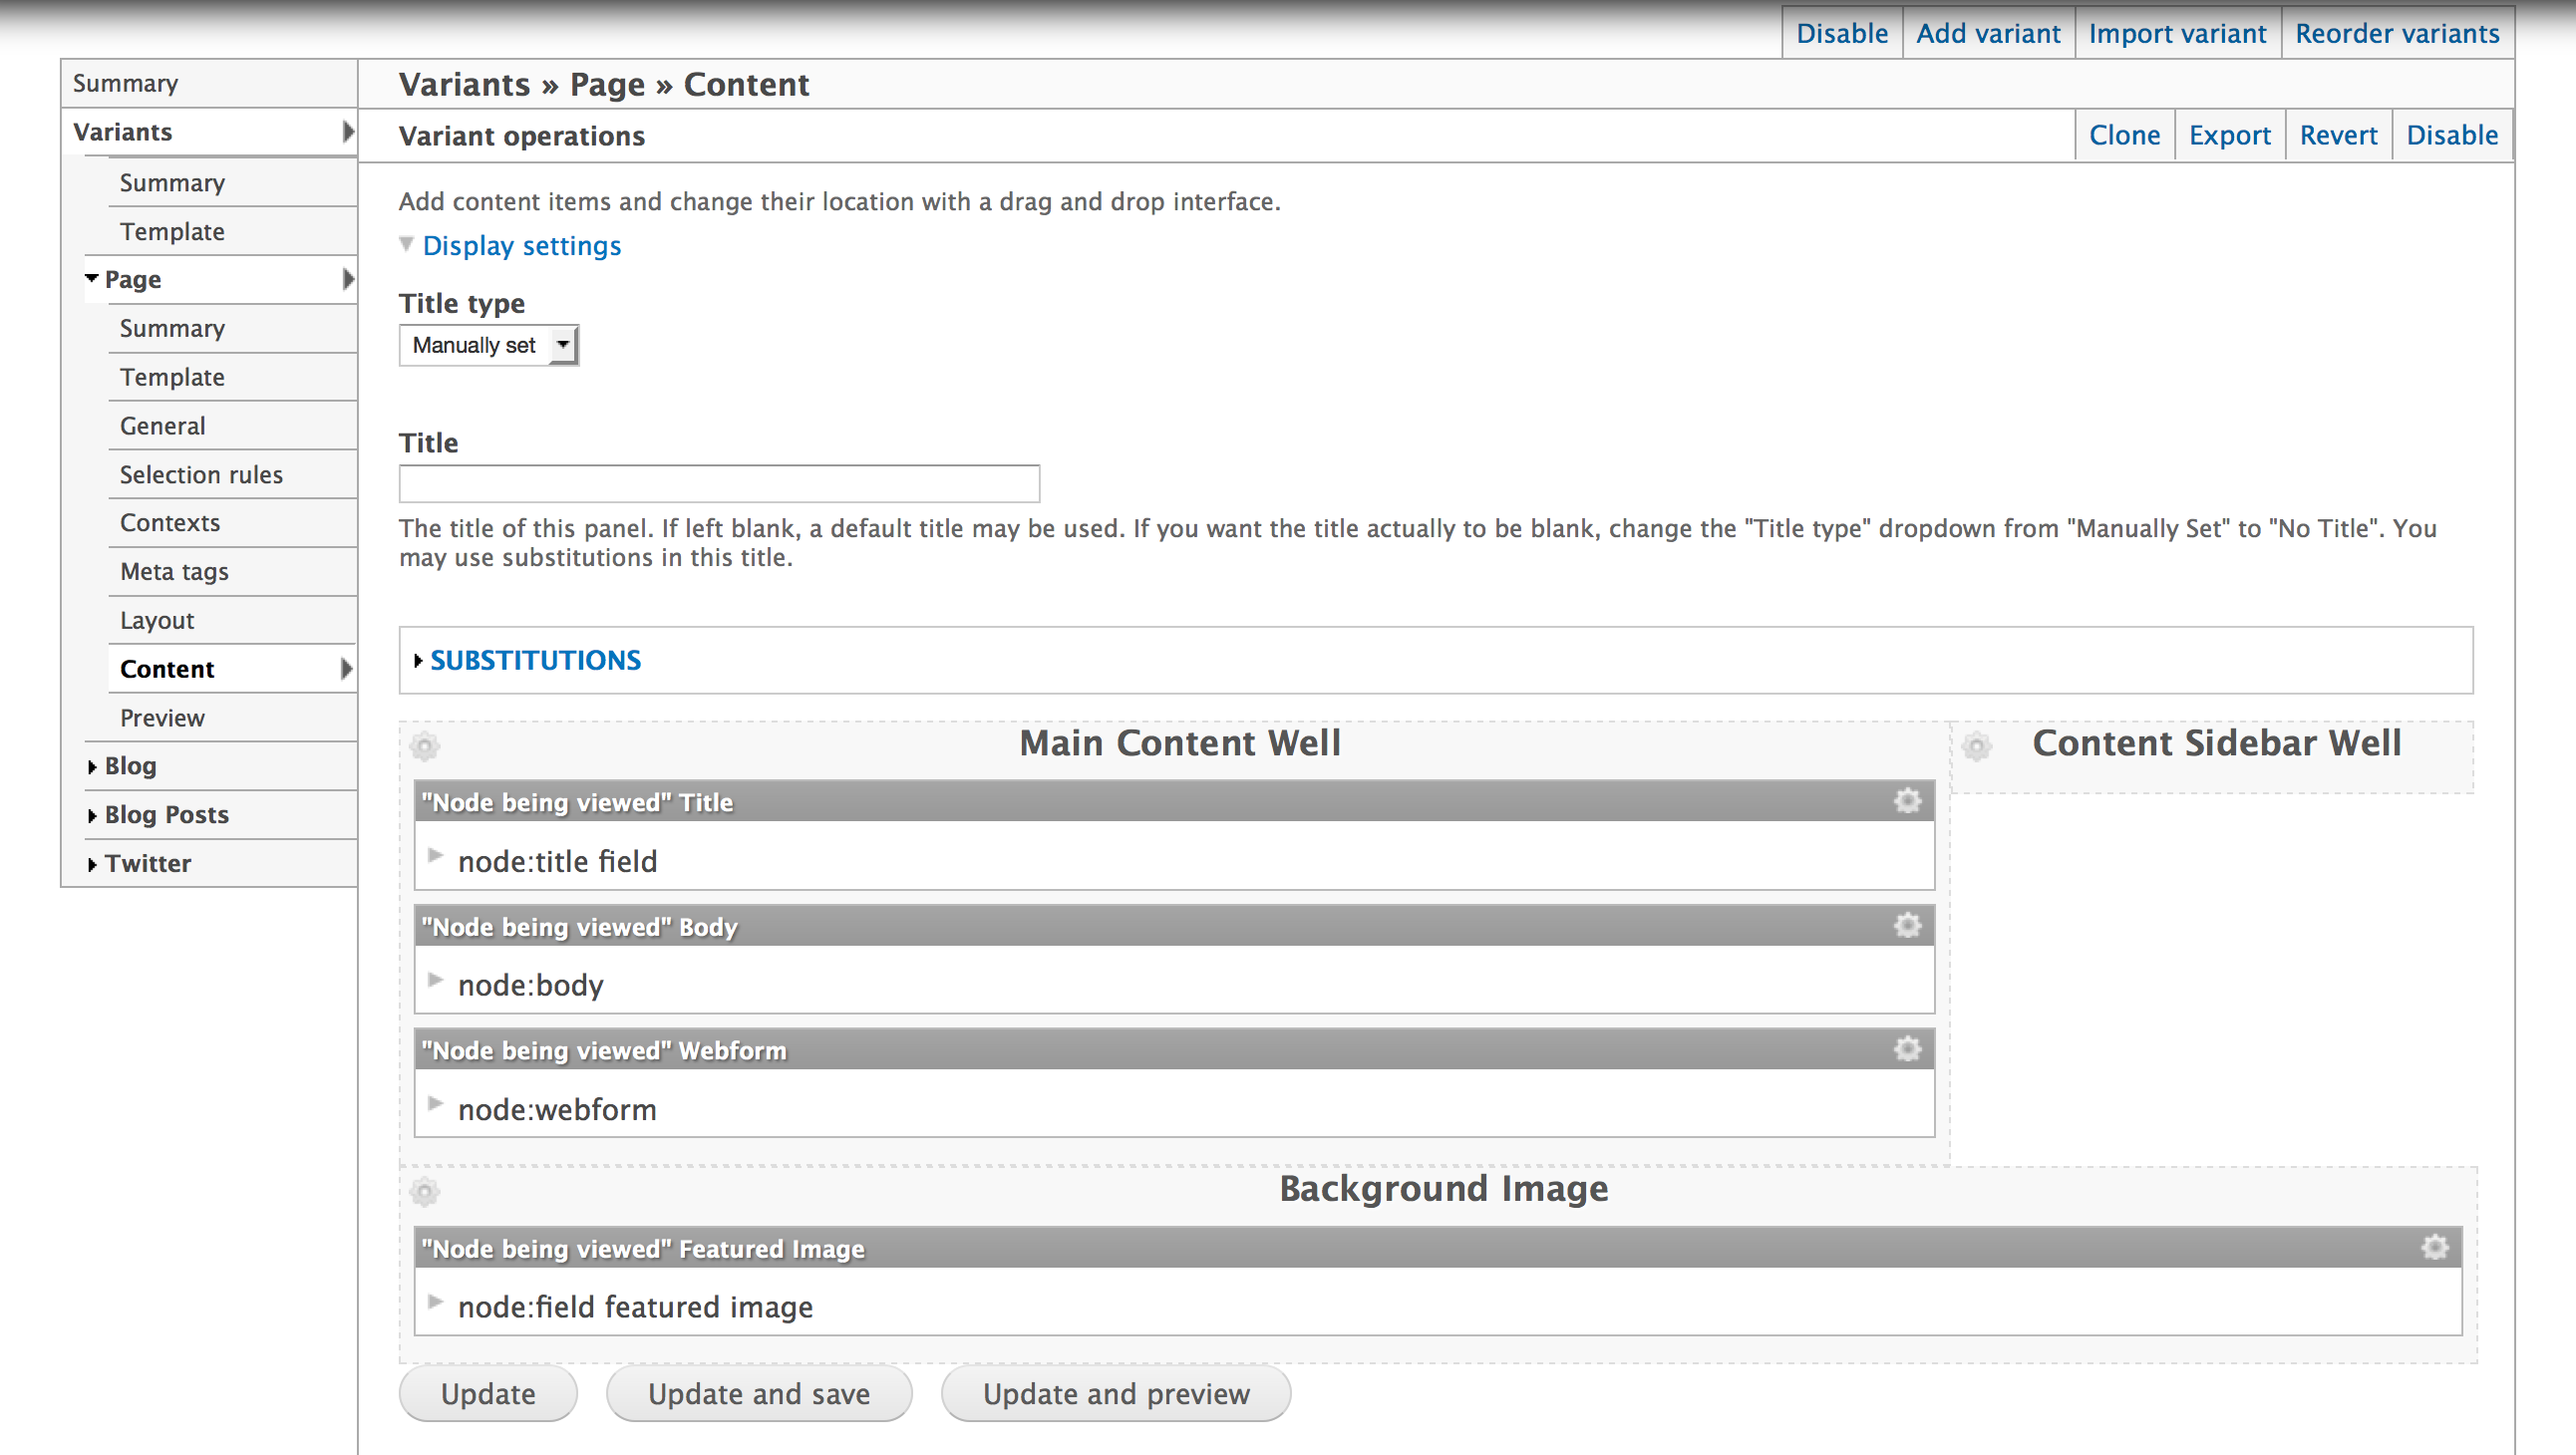
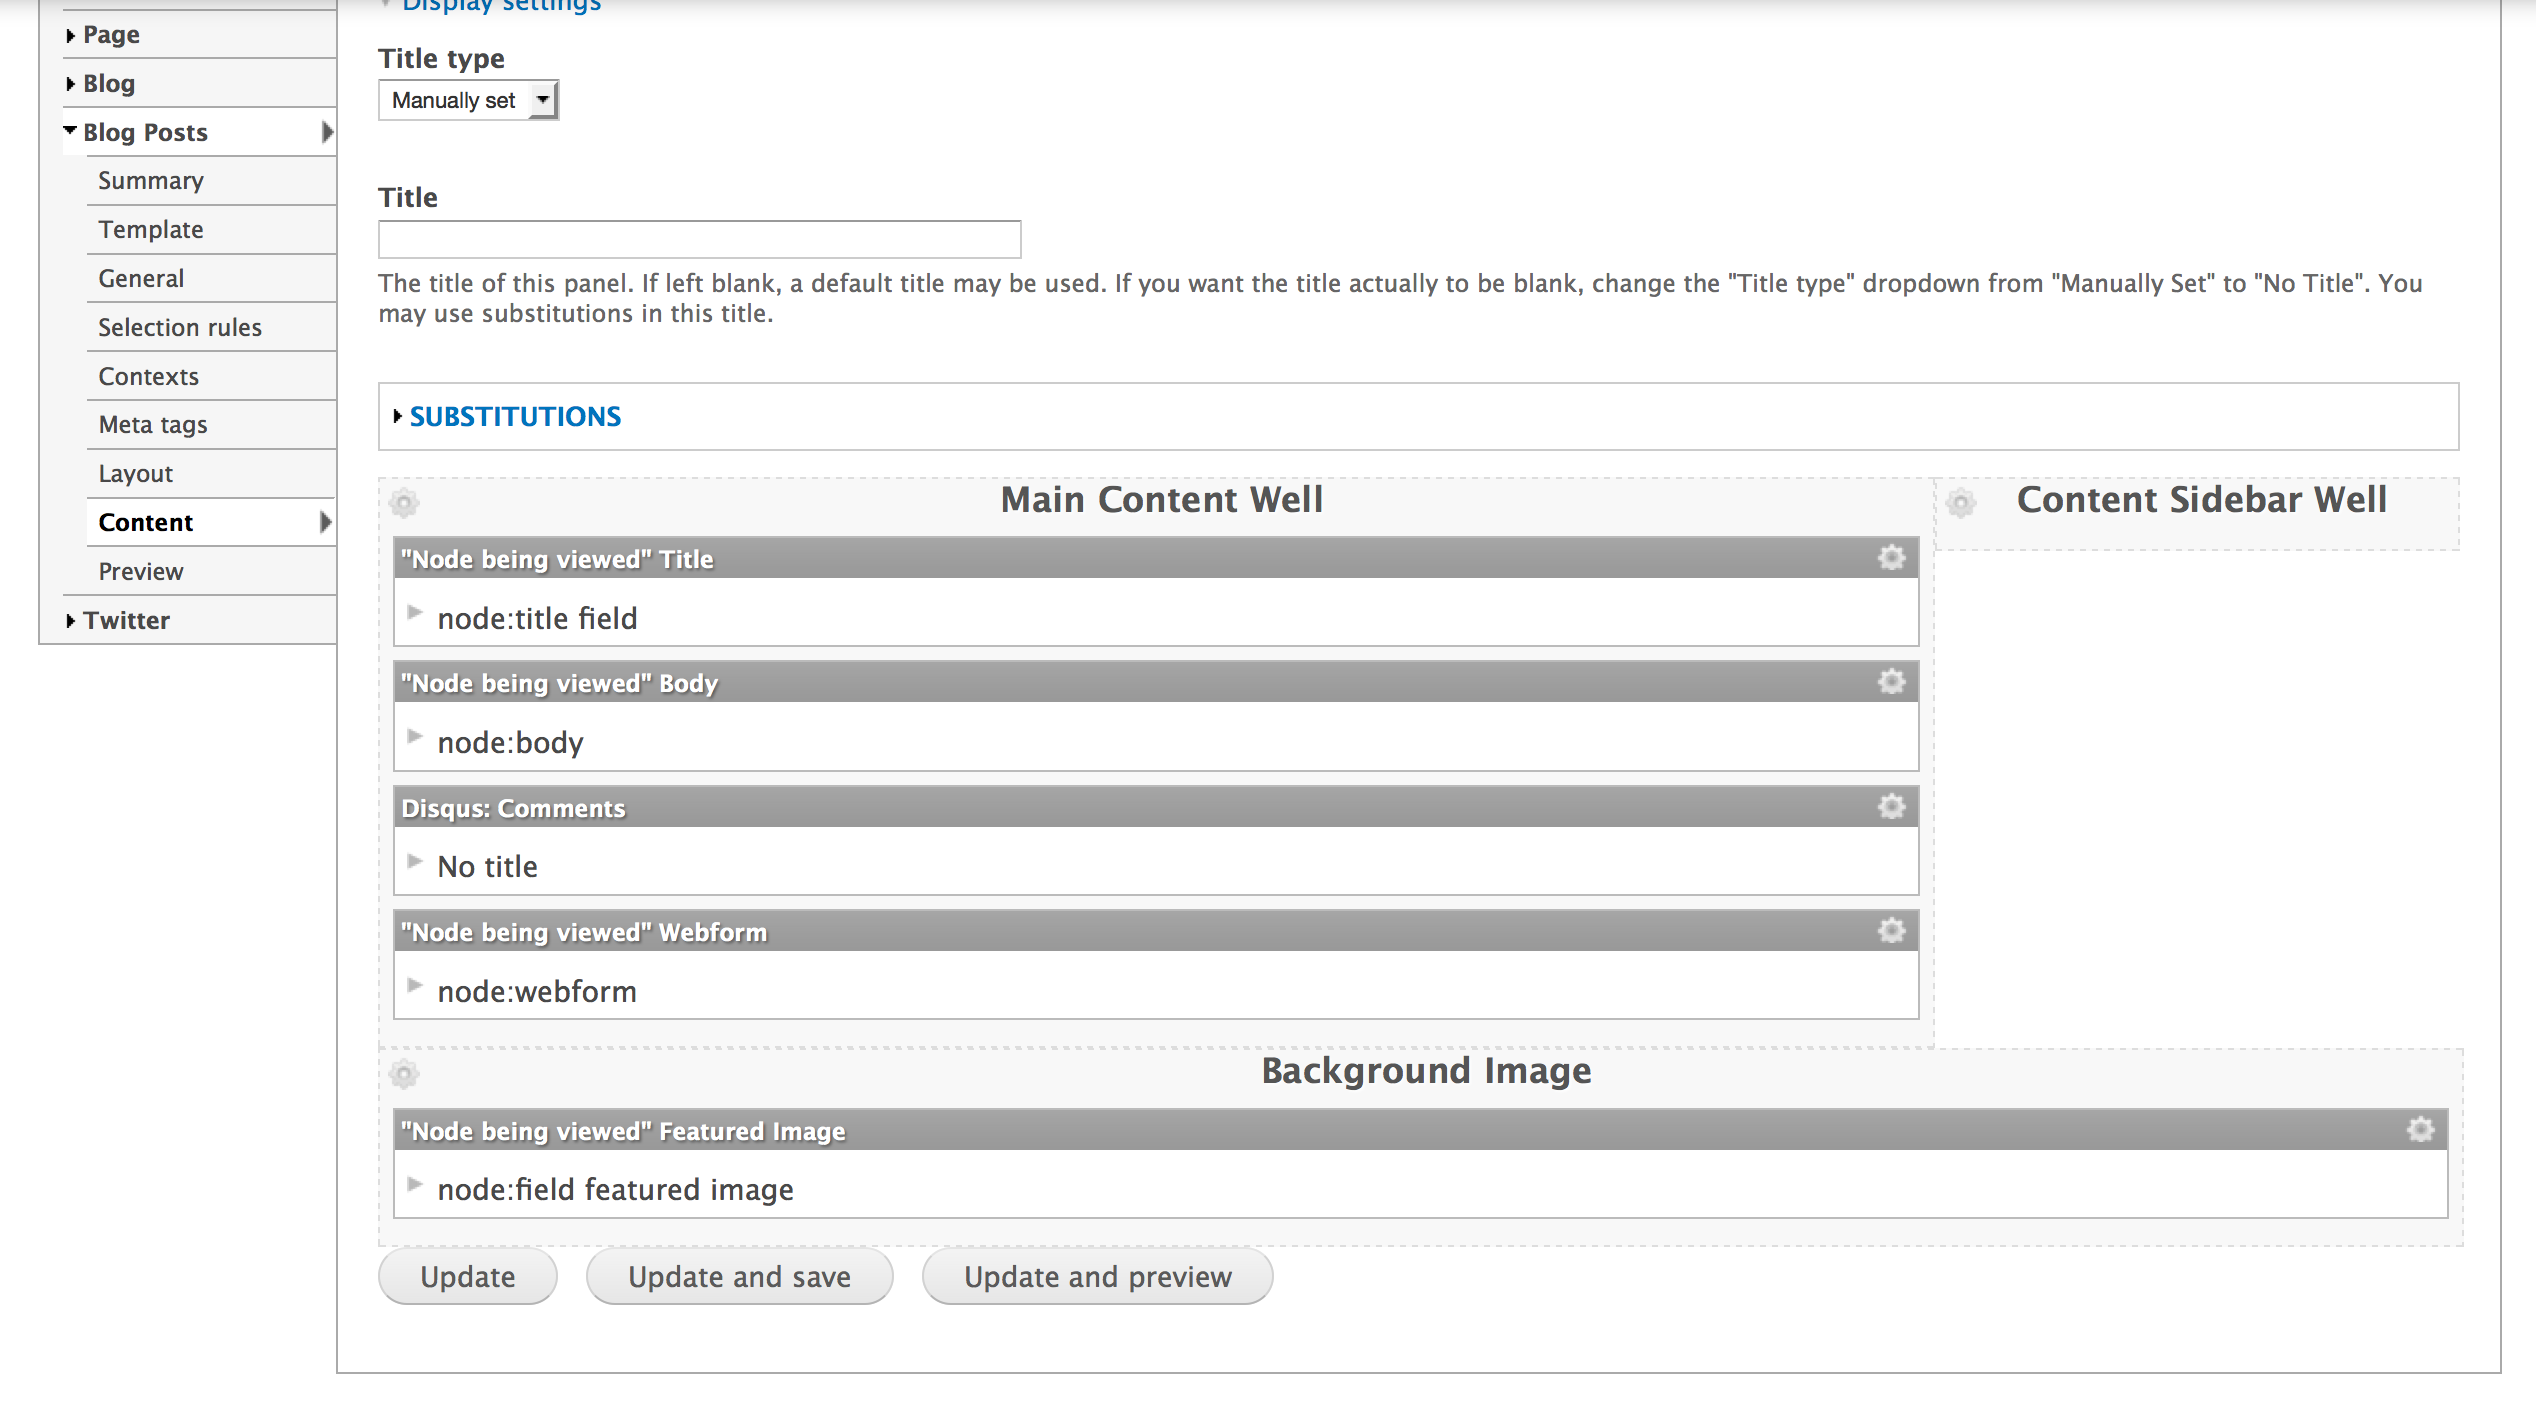
Next, choose the content. Here you have a multitude of options, you can select a Rendered Node, and use Entity View Modes that you have already set up, think Full Content or Teaser). You can also add content Field by Field which I have done below. The possibilities and customization options are endless.
Here is another screen capture of the Blog post Variant. The Selection Rule is Node Type = Blog Post. Almost everything is the same, but I have added the Disqus Comment block.
To Sum Up
Using Fences, we can gain complete control over fields. Using the Theme's templates, we can strip out any unwanted HTML insterted byr Drupal core. Page Manager allows us to define layouts, and what content gets loaded gives us complete control over the page. Using this system, we can:
- completely separate design from content and layout.
- easily create variations.
- configure customizations rapidly.
Future Exploration
This is not the end. There is so much more to explore and better our site building and development skills with. I will update this list as I write more. The following modules extend this Panels for additional functionality.
- Page Manager Existing Pages - For adding pages that already exist into Page Manager.
- Panelizer - For allowing the overriding of invididual nodes.
- Mini Panels - For adding more nesting of Panels inside of Panels
- Custom content panes and Views content panes - Blocks are slow, use Content Panes instead!
Presentation
I have also prepared this blog post as a presentation. You can view the slides or checkout them out on Slideshare: